CS 491 Lecture 5 – Modeling in Edit Mode
TODO
- Watch Neal Hirsig’s tutorials on UV mapping. There’s no quarter sheet, but we’ll be doing some UV mapping next class.
Lab
Today we’ll look at shaping models in Blender’s edit mode and incorporating them into Unity. In particular, we’ll model a cannon. I’m definitely not a lover of violence in games, but I choose this object because its a good object for learning to model. It’s also associated with forces, which are imperative for physics-based 3D games. That doesn’t mean we need to use it to shoot people.
Find a partner. I encourage you to work with someone you haven’t before! You’ll need access to Unity and Blender.
Cannon Barrel
Person A models. In Blender, make a cannon barrel that looks something like this (thanks, Shutterstock):
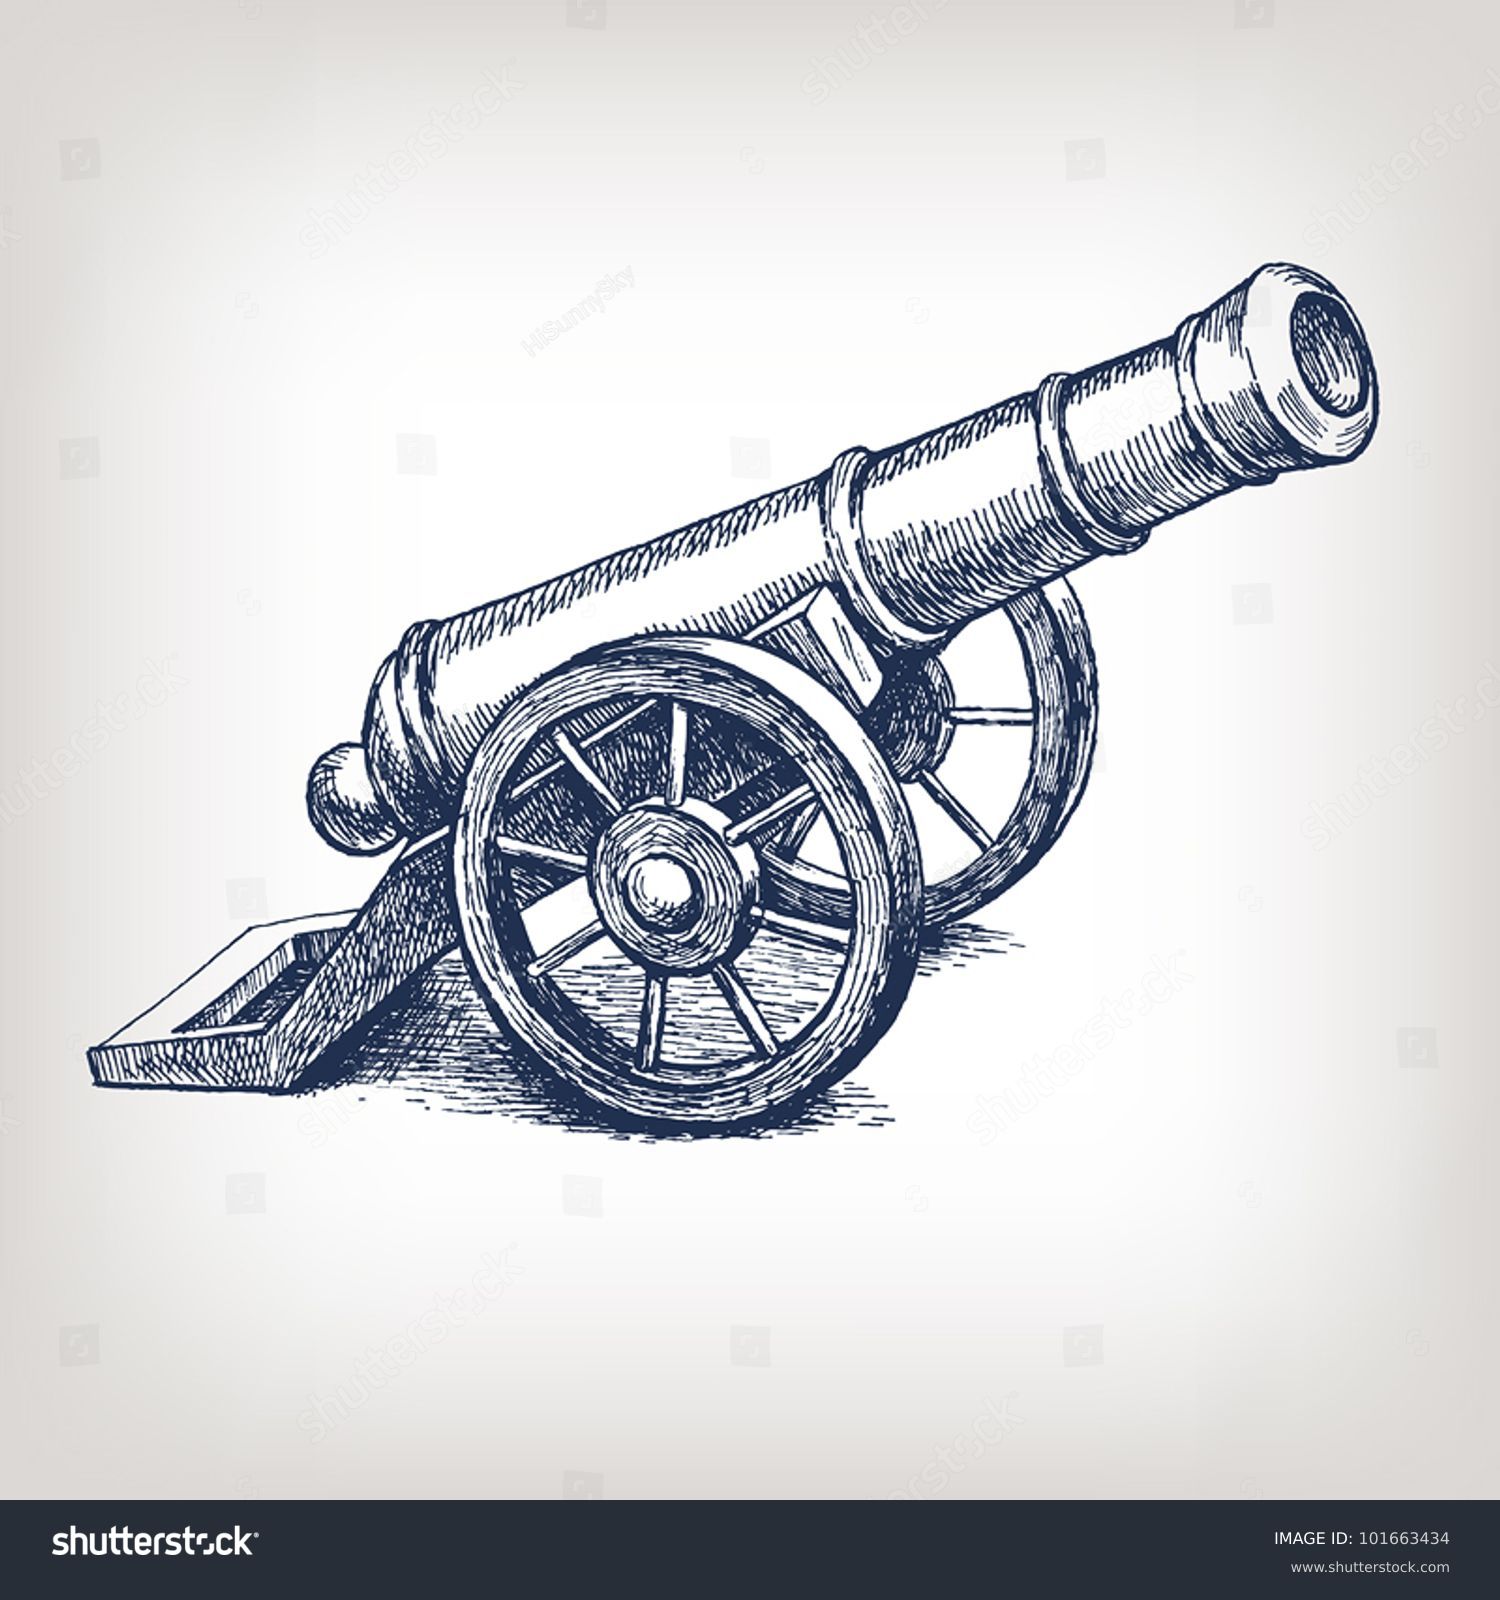
Focus on the barrel initially; we’ll get to the wheels later, and we’ll totally ignore the rest of the carriage. Follow these general steps:
- Start with a cylinder as the base object.
- Enter edit mode.
- The ngons that cap it are going to be hard to work with. Remove them.
- Recall or figure how to select an edge loop. Select one of the ends’ edge loops and scale it to produce a flare.
- Shape the ends by selecting the edge loop, extruding, and scaling.
- Close off the ball at the safe end of the cannon by scaling the last edge loop to 0 by by hitting
s0. This makes a bunch of vertices all converge at the same location. We’ll get smoother lighting and surface generation if we collapse them to just one. Select all vertices and hit Remove Doubles in the tool panel. Likewise for inside of the barrel. - Add a subdivision surface modifier to smooth things out.
- Create the bands by hitting
Control-Rin edge mode to insert new edge loops. Position two loops around each band. Select the faces between them (Numpad-5for an orthographic view,1or3or7for an axis-aligned view,Bfor box select). Extrude but hitEscapewithout moving them. Without deselecting, scale the extruded faces outward.
Wheels
Person B models. Follow these general guidelines:
- In a side view, position the 3D cursor where you want the axle center to appear relative to the barrel.
- In object mode, add a cylinder for the axle. (This needs to be separate so the two objects can move independently.)
- In edit mode, orient it appropriately. If you rotate in object mode, the axes will get confusing.
- We want to model only half the axle and one wheel, as the other half will be identical. Add an edge loop in the axle’s center and delete the vertices on one half.
- Add a Mirror modifier. Choose an appropriate axis and make sure Merge is checked to automatically combine vertices on the axes.
- Select the axle cap where the wheel should be. Hit
Shift-Sand move the 3D cursor to the selection. - Hit
Shift-Ato add a cylinder for the wheel hub. Orient and size it appropriately. - Similarly add a cylinder for the outer torus of the wheel. As above, ditch the ngon caps. Form the cutout by extruding and scaling the edge loops. To generate new faces between edges, select the edges and hit
F. - It’s time we spoke. In object mode, add a single cylinder. Orient, size, and position so that it emerges from the hub and enters the outer torus.
- Create the remaining spokes using an array modifier. First we need to establish the pivot point for the array modifier, which will rotate each subsequent spoke. Put the 3D cursor at the center of the wheel hub and add an Empty. Rename it Spoke Pivot.
- Select the spoke object and give it an array modifier. Uncheck Constant Offset and Relative Offset, but do check Object Offset and select Spoke Pivot as the target object. Set the Count to the proper number of spokes.
- Rotate the Spoke Pivot around the axis along which your axle runs. You should see the derived instances spin around. What angle do you want to rotate by to evenly distribute them?
- Join the spokes with the rest of the wheel so that they are all part of one object. First, apply the Array modifier. Then select both the spoke and wheel/axle objects. Hit
Control-J.
Beyond
If you finish the above before lab is over, try your hand at the following:
- Import the model into Unity.
- Control the barrel’s elevation angle with user input.