CS 347: Lab 7 – Flexbox 2
Dear students:
Welcome to lab. Now’s your chance to apply the ideas you read about. Find a partner and complete as many of the tasks below as you can. At the end of our time together, paste your HTML files into Crowdsource in order to receive credit.
Task 1
Recreate the following page using an internal stylesheet:
The page consists of left panel with emoji icons and right panel containing a photo masonry. Masonry is a mosaic of differently-sized boxes. In general, the boxes in a masonry have different widths and heights. Here the widths of the photos differ, but the heights are all the same. That makes this a special case called horizontal line masonry.
Follow these guidelines in your solution:
- Retrieve 20+ images from Lorem Picsum using URLs of the form
https://picsum.photos/WIDTH/200. For each image, replaceWIDTHwith a unique random number in the interval [100, 400]. - Use several Flexbox layouts. No other layout system or tricks are needed.
- The photo masonry is built out of a flex-parent with row orientation and wrapping. The children expand to fill any leftover space.
- The left panel has a fixed width but always vertically fills the viewport.
- Only the right panel scrolls. Use
overflow-y: autoon this container to keep the content from makingbodyscroll. - Don’t allow any images to be distorted.
The emoji have these HTML entities:
📷
🗄
❤️
🗑
Task 2
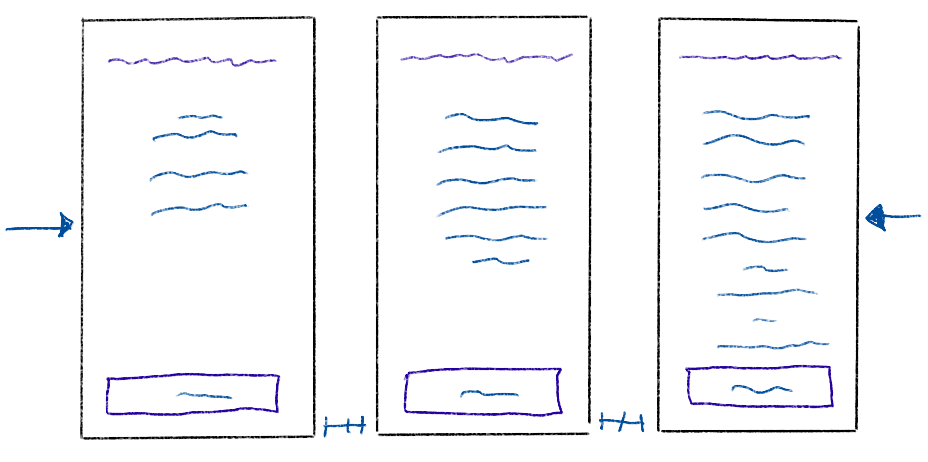
A pricing grid is a pattern you regularly on sites that offer different tiers of products or services. Implement your own pricing grid based on this mockup:

Follow these guidelines in your solution:
- Place the economy tier on the left, the preferred tier in the middle, and the premium tier on the right.
- Emphasize the preferred tier in some fashion to lure viewers toward it.
- List the available features for each tier. Each higher tier should have more features than its predecessor, leading to differing amounts of content.
- Make all tiers’ boxes have the same height.
- Place a button at the bottom of each tier. Ensure they are all aligned.
- Center the tiers horizontally.
TODO
The next step of your learning is to complete the following tasks:
- Read the chapter Position in All Over the Web.
- Continue working on the first project. Place your project in its own Git repository, and add me as a collaborator on that repository. Have a skeleton of your page up on your server by Tuesday and be prepared to explain your theme and progress. Serve it just as you did your blog, but use
ServerName project1.YOUR-DOMAIN-NAMEin your new Apache virtual host configuration. - Research some aspect of web development on your own. Find articles and videos beyond what’s assigned. Summarize what you learn in a couple paragraphs of your own words and a snippet of source code in your next blog entry before Friday morning. Clearly put the date of the blog entry on your index page. If any of the requirements is not met, you will not receive full credit.
See you next time.
