CS 318: Lab 7 – Box Model
Dear students,
Let’s stop a moment to reflect upon what we have done so far this semester:
- We’ve organized information in a hierarchy and represented it in plain old text.
- We’ve seen how to make our text “hyper” through the use of images and links.
- We’ve added style to established elements of this hierarchy.
- We’ve learned to identify elements in more ad hoc ways—through their unique identifiers and membership in classes.
- We’ve battled tools for authoring and sharing web documents.
Where are we headed next? Layout. Most everything we’ve done so far has followed the natural document flow, which fills all our elements in from left-to-right, top-to-bottom. We need to break out of this.
Our first step in doing so is to discuss HTML’s box model. In this model, the spatial footprint of every element is determined by a few properties:
width: measures the horizontal span of the element’s content boxheight: measures the vertical span of the element’s content boxpadding: measures the gap between the content and its borderborder-width: measures the thickness of the element’s bordermargin: measures the gap outside the border, which influences how the element is set apart from its parents and siblings
Let’s experiment with a few of these properties. I’m going to right-click and Inspect this element with my browser’s developer tools. Then we’ll tweak these properties directly and see what impact they have.
The border, margin, and padding do not need to be uniform. Each side can have a different value. They can be set individually:
margin-top: 30px;
margin-right: 20px;
margin-bottom: 10px;
margin-left: 0px;
Or all at once:
// the order is like a clock: 12-3-6-9
margin: 30px 20px 10px 0px;
If you want the same values on the vertical sides and the horizontal sides, you can use an even more compressed form:
// the order is vertical horizontal.
margin: 30px 10px;
Block elements respond as you’d probably expect to these properties, but phrase elements behave differently. For example, the height property has no effect on phrase elements. Same with the top and bottom margin. In general, vertical spacing through these properties is ignored for phrase elements. Top and bottom padding will reveal the phrasal content’s background color, but it won’t affect vertical spacing.
There are several strange quirks about the box model that you should be aware of—eventually. We’ll settle for learning one of these today. When you specify width and height, you are specifying the width and height of the content, not including the padding, border, and margin. This is often not so natural. When calculating layouts, we tend to be more concerned about the dimensions of the framed box—not just the content. We can make CSS behave like this by setting the box-sizing property for all elements:
* {
  box-sizing: border-box;
}
The default is content-box. I encourage you to automatically add this rule to the top of every CSS file you ever create.
Our lab exercises for today will give you a chance to explore the box model.
Here’s your TODO list for next time:
- We will not have class on Wednesday. I am attending a conference to become a better, more informed teacher of computer science!
- Start milestone 2—a user test and sitemap—of your project. This is due on March 5.
- Read chapters 5 and 6. On a quarter sheet, write down 2-3 questions or observations inspired by your reading.
See you then!

Lab
We have a few goals for today’s lab:
- Explore the various box model properties.
- Use multiple backgrounds.
Your task is to create several independent pages with no overarching story.
Boxing
Your first task is to reverse engineer a few boxes whose properties have been customized. Consider the following box:
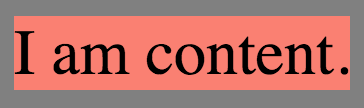
It is produced with this HTML:
<div class="outerbox"><div id="box0" class="innerbox">I am content.</div></div>
And this CSS:
body {
  background-color: gray;
}

.outerbox {
  margin: 10px;
  background-color: goldenrod;
  display: inline-block;
}

.innerbox {
  display: inline-block;
  background-image: linear-gradient(salmon, salmon), linear-gradient(#1E90FF, #1E90FF);
  background-clip: content-box, padding-box;
}

#box0 {
}
Create files boxes.html and boxes.css. Paste the code given above in these files. These rules color the margin box goldenrod, the padding box blue, and the content box salmon.
Copy and paste the outer-inner div combo to create four more boxes. Change their ids to box1, box2, etc. Add rules for these ids to style the boxes like the ones shown below. Do not modify the existing rules; just add new ones.
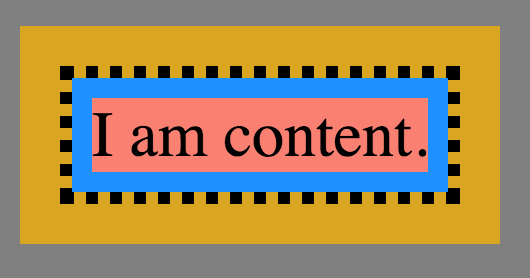
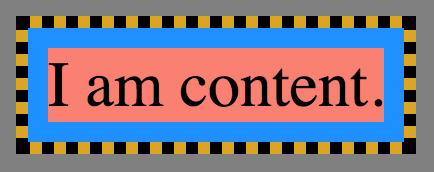

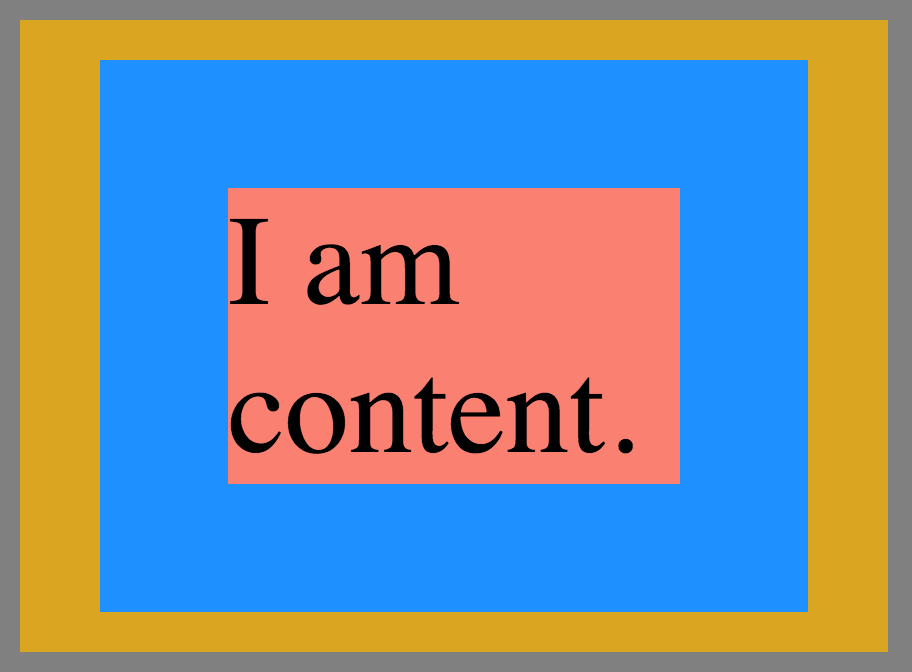
Be observant. The relative sizes are more important than the exact sizes. Different browsers handled dotted borders differently. Some show squares, some circles. There’s not much you can do about that.
Countries
Your second task is to create a page of several country “stamps.” Something like this:
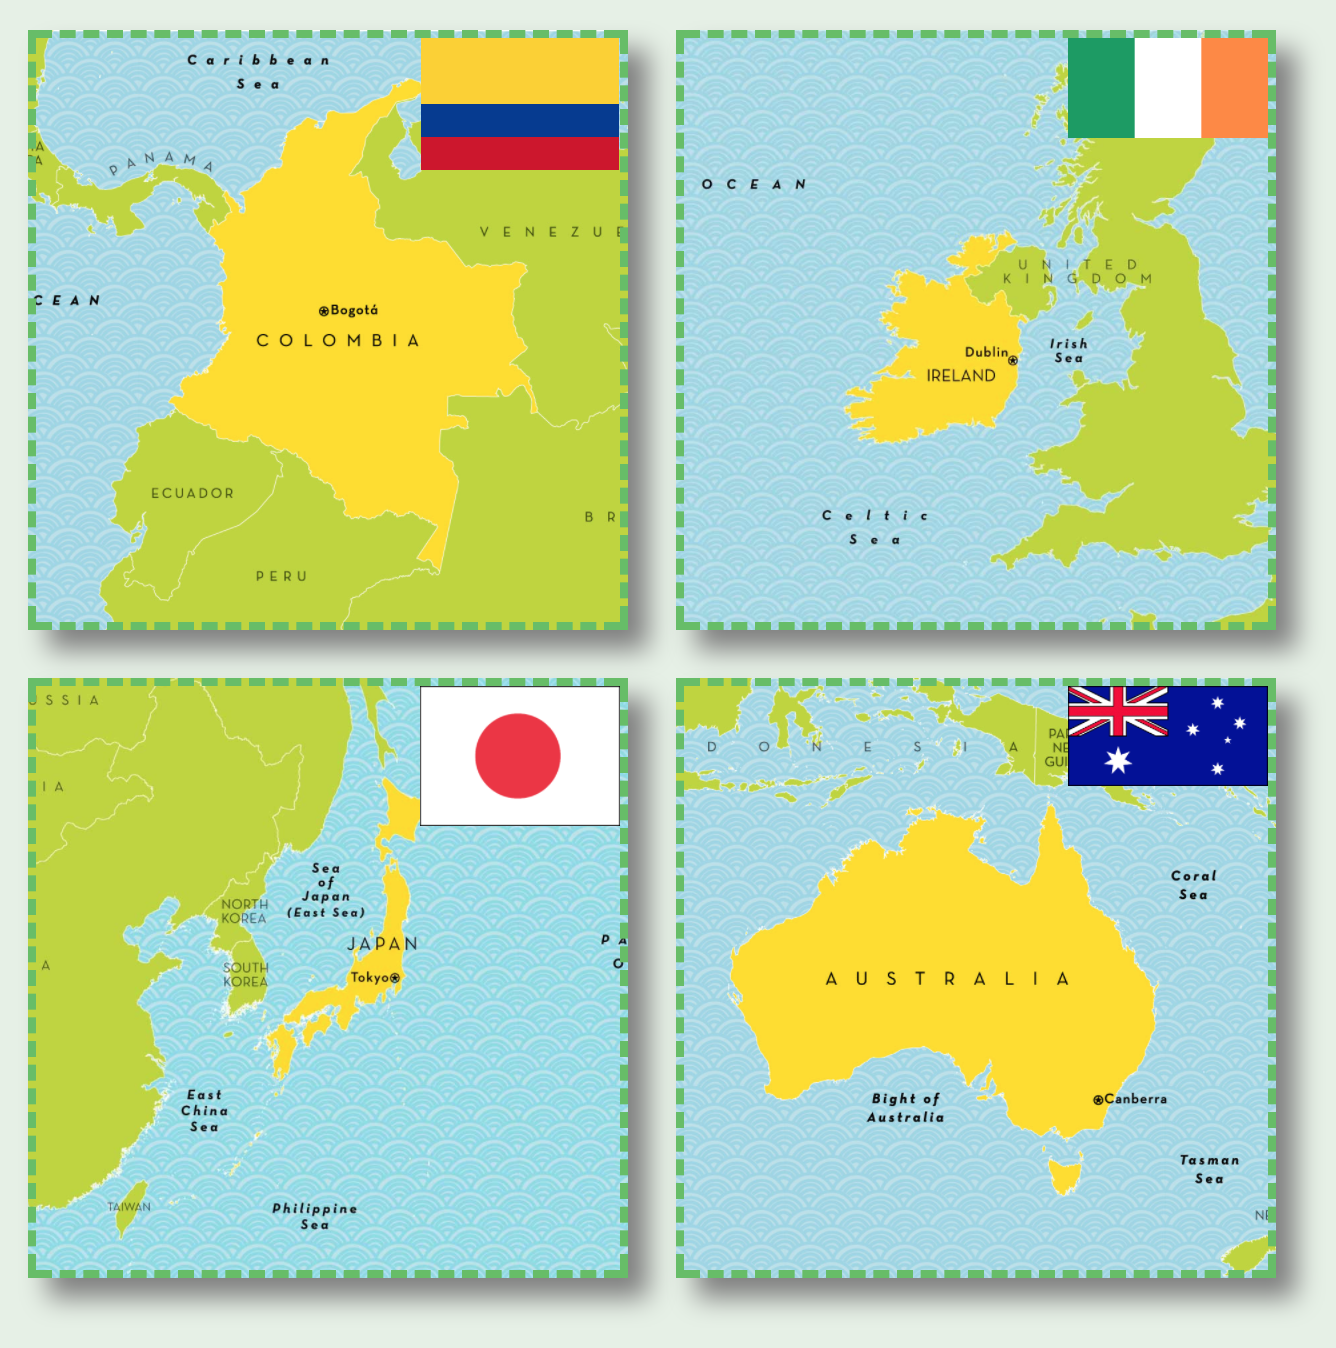
We won’t spell out every individual step you should take to achieve this, but we do provide a rough checklist. You will almost certainly need to consult the MDN documentation to understand a few CSS properties.
- Name your files
countries.htmlandcountries.css. - Set the
box-sizingproperty of all elements toborder-boxso that specifying the width and height of an element includes all but the margin. - Give your page a light but non-white background.
- Use four
divs for the stamps, each of classstamp. Apply shared style rules to thestampclass. - Give each stamp a unique ID. Probably the country name. Apply country-specific style rules to these IDs.
- Make the
divs inline blocks (through theirdisplayproperty) and arrange them in a 2×2 grid. - Make each stamp 300×300 pixels.
- Add a 10-pixel margin to the stamps.
- Give each stamp a 4-pixel, greenish, dashed border.
- Give each stamp a drop shadow.
- Set the base background image of each stamp as a map of the country. Use maps from National Geographic Kids. As long as our purpose is educational and our use of their imagery is minimal, this falls under the category of fair use. (Your projects, on the other hand, should not use images without an appropriate license.)
- Use
background-positionto center the image both horizontally and vertically. - Use
background-sizeto scale the maps. If you set the width and height to numeric values that are not in the same proportion as the dimensions of the image, the image will appear distorted. If we fix one of the dimensions to some numeric value, we can let the other be automatically calculated to maintain the proportion usingauto. In this case, we have maps that are wider than they are tall. Which dimension should beauto? Make the other dimension 300 pixels so it fits exactly within thediv. - Place a second background image of each country’s flag in the upper-right corner of its stamp. Consult the MDN documentation on how to add multiple backgrounds.
Ask questions if your results aren’t matching up with the example.
Publish and Validate
Commit and push your work. Verify that all pages have been uploaded by visiting https://USERNAME.github.io/cs318/lab07 in your browser.
Validate your pages with the W3C CSS Validator. Paste in the URLs to your pages, one at a time, and address all concerns raised by the validator. Fix your changes on the local machine, commit, and push until the validator reports no errors or warnings.