Half-homework 1 – Maintenance – due September 23
Your objective in this homework is to acquaint yourself with the world of mathematical calculation using a programming language. Math in code is a little different than the calculator math you are used to in the following ways:
- Programmers make considerable use of variables, whose names tend to be longer and more meaningful.
- Numbers are typed. Some number types (like
double) allow fractional components, others are subsets of integers (likeint). - Other types of data exist too (like
Strings). - Some operators, like the remainder operator (
%), aren’t as commonly used in the math you’ve learned in school. - Mathematical functions like
sinandcosare available, but they are defined inside the classMathand must be invoked through it (for example,Math.sin(0)). - In code, we focus more on the step-by-step process of producing an answer and less on stating mathematical truths.
You will encounter these differences as you solve the following four problems of calculation.
Requirements
Complete the four classes described below. Place all classes in package hw1. Note that some requirements are about your program’s output, while others are about the code you write to achieve the output.
Capsule
Class Capsule helps the user calculate the area of a capsule. Its main method asks the user for the length of the capsule’s bounding rectangle and the diameter of its circular caps, as shown in the following figure:

It prints out the area to 4 decimal places. Match the output format shown in this example exactly—even the whitespace:
Length:⎵2 Diameter:⎵1 Area: 1.7854
Where you see a ⎵, insert a space character. Where you see foo, the user inputs a value. Where you see a ¶, insert a linebreak by using println (or printf and %n). You may be tempted to to use \n or \r\n to insert a linebreak, but neither is standard across all major operating systems. Your code will not be portable if you use them. The output, of course, will change based on what the user enters.
Read from System.in and write to System.out. Assume the user enters two double values. If users enter unreasonable values (like a negative diameter or length "furniture"), do nothing special. For now, let the program crash or compute strange results.
Crank
Class Crank helps the user determine what number will be reach when a dial is turned a specified number of ticks. Imagine the dial shown in the following figure:

The dial starts at 12 and ends at 17. It is currently set to 14. If the user is told to crank the dial 20 ticks, the dial would go from 14 to 15 to 16… If the dial had more numbers, after 20 ticks we’d land on 14 + 20 = 34. But the dial doesn’t reach 34. Instead, the numbers wrap back to 12 once they exceed 17. So, what number should we land on?
Imagine this virtual dial, on which we pretend that the higher numbers are written on rings outside the actual dial, like this:

After 17 we go to 18 on the next ring, then 19, then 20, and so on. Eventually we reach 34. The number on the actual dial, the innermost ring, that corresponds to 34 is 16. And that’s our answer. In this dial’s arithmetic, 14 + 20 = 16.
Prompt the user to enter the start and end numbers of the real dial, the number from which the cranking starts, and the number of ticks to turn. Print the number we turn to. Match the output format shown in this example exactly—even the whitespace:
Lo:⎵12 Hi:⎵17 From:⎵14 Ticks:⎵20 To: 16
To solve this, it helps to temporarily pretend the dial starts at 0 and ends at 5 instead of 12 and 17. Instead of wrapping 14 + 20 around, we effectively wrap 2 + 20 around this dial:

On the 0-dial, 2 + 20 = 22, which is in the same wedge as 4. Once we’ve solved the problem for the 0-dial, we must apply the result back to the 12-dial. The same operation that turned 14 to 2 can be reversed to turn 4 into 16.
Handle I/O as you did for Capsule.
Wend
Class Wend helps the user determine whether a turn is clockwise or counterclockwise turn. Its main method asks the user for the coordinates of three 2D points, as labeled in the following figure of a left or counterclockwise turn:

Contrast this to a right or clockwise turn:

The journey begins at (x1, y1) and ends at (x3, y3). If the bend at (x2, y2) turns counterclockwise, print 1. If clockwise, print -1. If the three points are collinear, forming a straight line or bending 180 degrees, print 0. Match the output format shown in this example exactly—even the whitespace:
x1:⎵0 y1:⎵0 x2:⎵1 y2:⎵0 x3:⎵1 y3:⎵1 Direction: 1
How on earth does one determine the direction of the bend? Use this non-obvious formula for computing the signed area of the three points:
The area is positive for a counterclockwise turn, negative for clockwise, and 0 for collinear points. The magnitude of the number will vary. Search the Math class documentation for a way to turn a number of arbitrary magnitude into 1, 0, or -1.
Handle I/O as you did for Capsule. Assume that the numbers the user enters are doubles.
Uvula
In your mathematics education, you’ve spent a lot of time learning about functions, which map independent x to dependent y. Because they associate each value of x with a single value of y, functions are unable to express graphs that backtrack along the x-axis, like this one that looks a bit like a uvula:
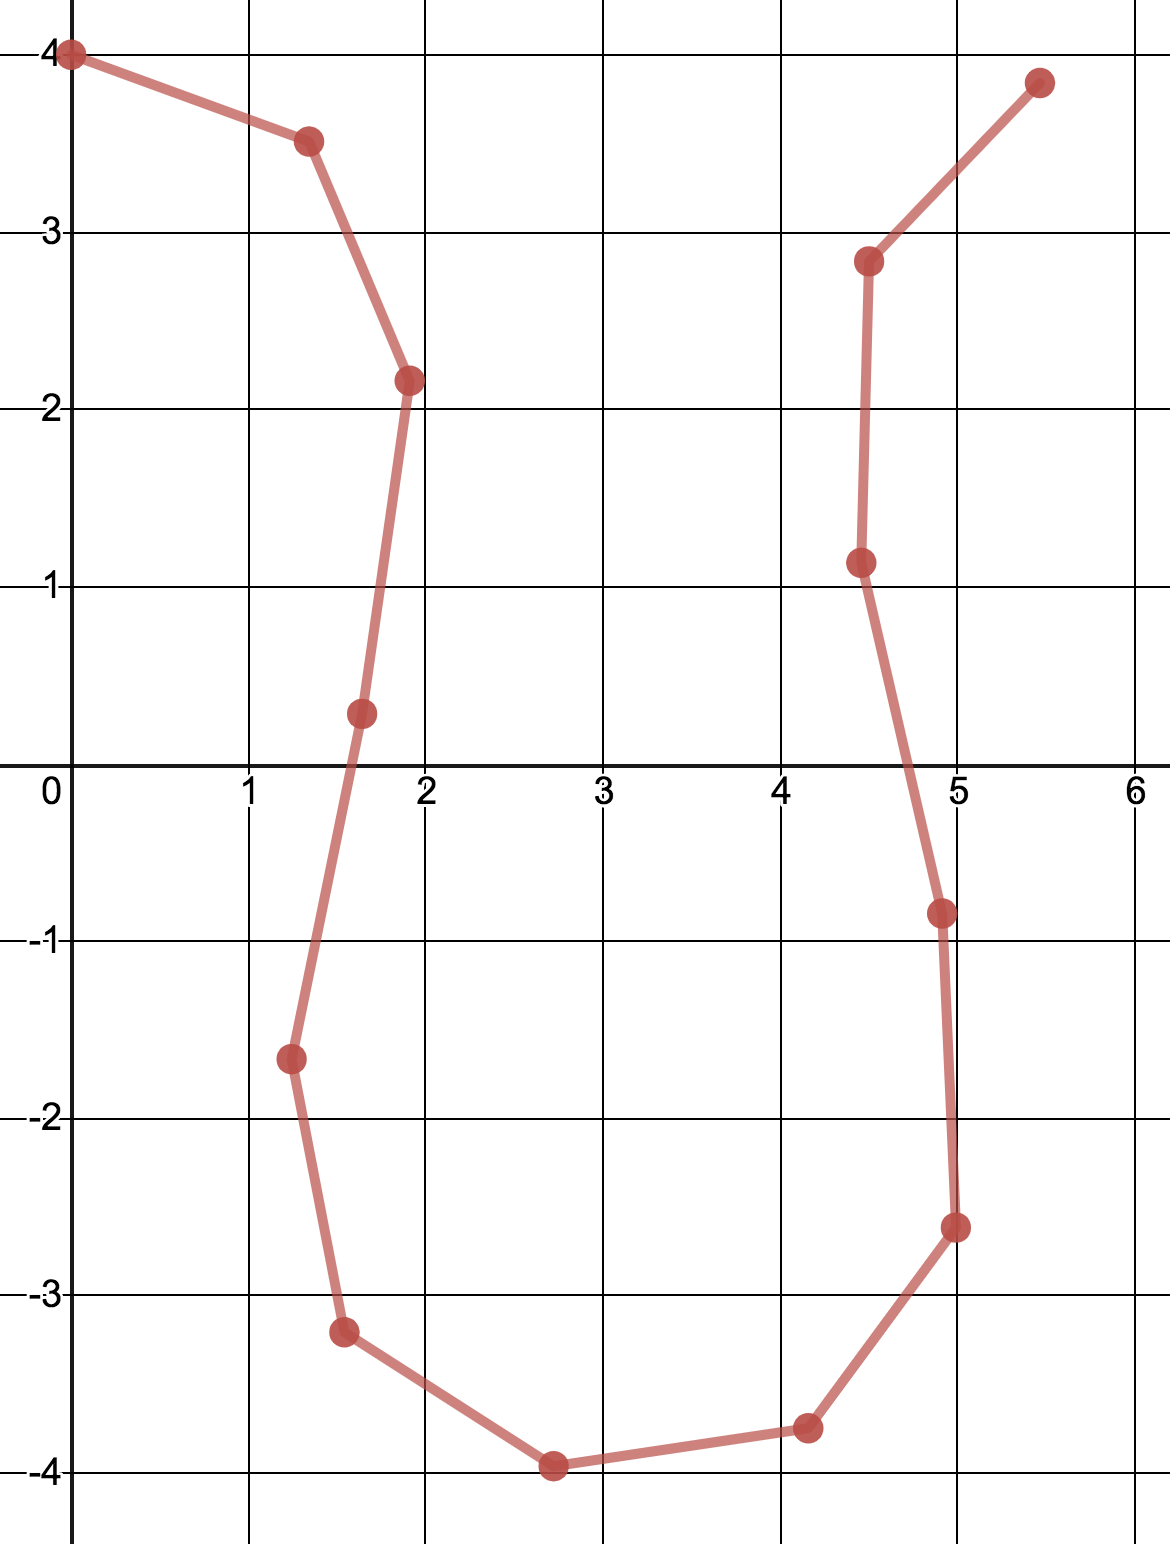
We cannot use functions of x and y to model such shapes, but we can use parametric equations. We will make both x and y functions of parameter t. For example, consider these parametric equations that produce the uvula above:
The term scale is another independent variable that adjusts the width of the uvula.
You can think of t as a measure of time. When t is 0, we have:
Thus we see (0, 4) on the graph. We also see the coordinate pairs for when t is 1, 2, 3, and so on, up to 12.
The main method of class Uvula prompts the user for a scale and displays the coordinates of a uvula by sampling the parametric equations described above for integer values of t in [0, 12]. Match the output format shown in this example exactly—even the whitespace:
Scale:⎵0.5
0.00,4.00
1.34,3.51
1.91,2.16
1.64,0.28
1.24,-1.66
1.54,-3.20
2.72,-3.96
4.16,-3.75
4.99,-2.61
4.91,-0.84
4.46,1.13
4.50,2.83
5.46,3.84
Handle I/O as you did for Capsule. Print each coordinate to 2 decimal places. Test your solution by pasting the output coordinates directly into Desmos.
Submission
To check your work and submit it for grading:
- Run the SpecChecker by selecting
hw1 SpecCheckerfrom the run configurations dropdown in IntelliJ IDEA and clicking the run button. - Fix problems until all tests pass.
- Commit and push your work to your repository.
- Verify on Gitlab that your submission uploaded successfully by adding the comment
test hw1to any commit. You will receive an email of the SpecChecker results.
A passing SpecChecker does not guarantee you credit. Your grade is conditioned on a few things:
- You must meet the requirements described above. The SpecChecker checks some of them, but not all.
- You must not plagiarize. Write your own code. Talk about code with your classmates. Ask questions of your instructor or TA. Do not look at others’ code. Do not ask questions specific to your homework anywhere online but Piazza. Your instructor employs a vast repertoire of tools to sniff out academic dishonesty, including: drones, CS 1 moles, and a piece of software called MOSS that rigorously compares your code to every other submission. You don’t want to live in a world serviced by those who achieved their credentials by questionable means. For your future self, career, and family, do your own work.
- Your code must be submitted correctly and on time. Machine and project issues are common—anticipate them. Commit early and often to Git. Extensions will not be granted. If you need more time to make things work, start earlier.