Pentatouch, Part I
This post is part of a series of notes and exercises for a summer camp on making musical instruments with Arduino and Pure Data.
The monodrone allows us to pound on a single key of a piano, while this next instrument allows us to pound on five. We’ll call it the pentatouch, as it will generate five pitches of a major scale: do, re, mi, fa, and so. It consists of five buttons, each wired to a different input pin on the Arduino:
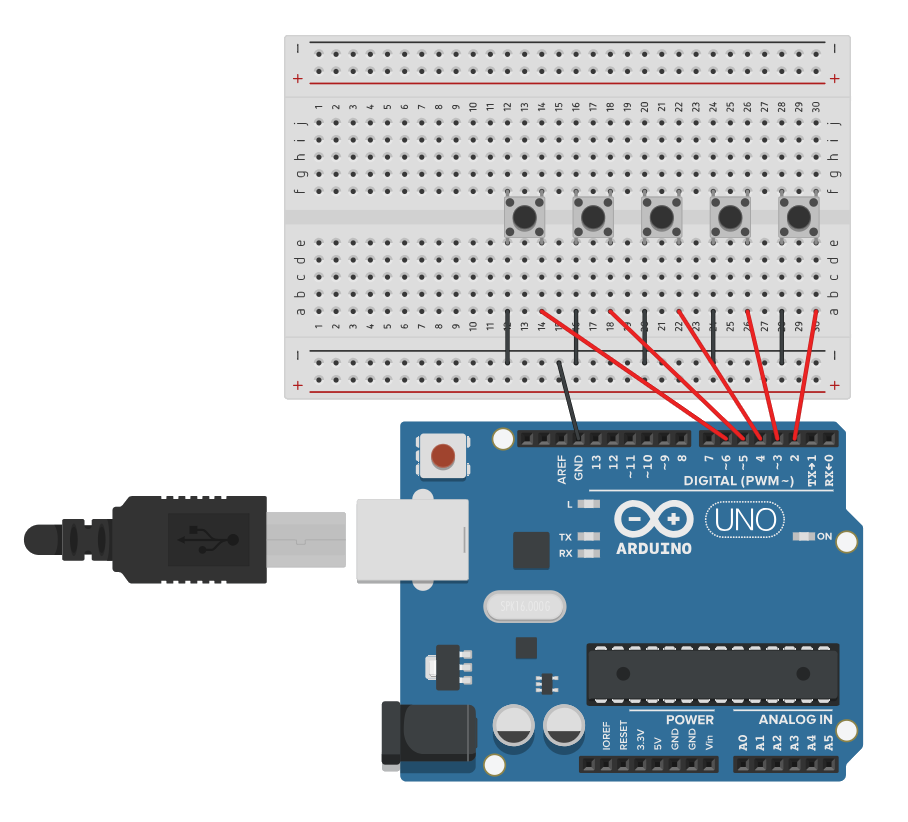
Go ahead and wire this up. Use pins 2–6 on the Arduino.
Notice that instead of wiring each button directly to ground, we wire all five buttons to the negative row or rail of the breadboard, and we then wire the negative rail to ground. Electrons leave ground and distribute out along the entire rail, passing through the five outgoing wires. Making a single flow branch out along several paths is called fan-out, and it makes the circuit a little simpler.
To program the Arduino, we essentially want to scale up what we had for the monodrone. Expand the following program to set up and read all five pins:
void setup() {
  pinMode(2, INPUT_PULLUP);
  pinMode(3, INPUT_PULLUP);
  // etc...
  Serial.begin(9600);
}

int old_button0 = LOW;
int old_button1 = LOW;
// etc...

void loop() {
  int button = !digitalRead(2);
  if (button != old_button0) {
    Serial.print(0);
    Serial.println(button);
    old_button0 = button;
  }

  button = !digitalRead(3);
  if (button != old_button1) {
    Serial.print(1);
    Serial.println(button);
    // etc...
  }

  // etc...

  delay(50);
}
Notice that when a button is pressed or released, we print two things: the button’s ID and the button’s state. Before we only printed the state. There was only one button, so we knew which one changed. Here, we need to identify the button. For simplicity later on, we identify the button connected to pin 2 as button 0, the button connected to pin 3 as button 1, and so on.
It’d be nice if the button 0 was wired to pin 0, button 1 was wired to pin 1, and so on. But notice that pins 0 and 1 are labeled RX (receive) and TX (send or transmit). If you use them, you will interfere with the serial connection to the computer. Don’t do it.
Challenges
After you get your hardware working, answer the following questions on a piece of scratch paper.
- Our code is really repetitive. Investigate
forloops in C++. Whatforloop could reduce the five repetitivepinModecalls to a single call? - Could the code inside
loopbe simplified in the same way? - Our program could be further simplified using a feature called an array. Investigate arrays as a mechanism for storing collections of data—like our five
old_button[01234]variables. What single array declaration could replace the five separate variable declarations? You need not alter your code yet, just investigate. We’ll use arrays more in future exercises.
Once you are sure that your pentatouch is generating the correct output, switch the print and println calls to write.