Arpeggiator, Part I
This post is part of a series of notes and exercises for a summer camp on making musical instruments with Arduino and Pure Data.
First order of business: switch partners. Choose a partner that you haven’t worked with yet.
Our previous instrument played multiple notes—a chord—all at the same time. Today we’ll make an instrument that plays a chord’s notes from lowest to highest in quick succession. Such sequences are called arpeggios. The arp- stem of arpeggio refers to the instrument we know as the harp, which is often played by plucking strings in ascending and descending sequences. An instrument that plays arpeggios is sometimes called an arpeggiator, so that’s what we’ll call our instrument.
Hardware
The arpeggiator will have three controls: a dial for picking the arpeggio’s root, a dial for setting the tempo, and a dial for choosing which sequence from the root to play. Build a circuit like this using three potentiometers:
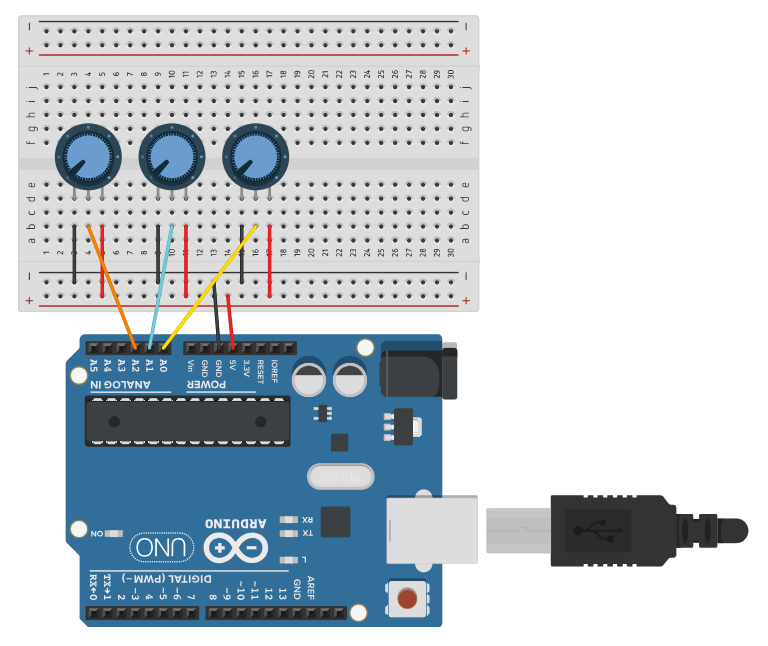
Recall from the tiangle that a potentiometer has three pins. Electrons come in from ground on one side and slip out the opposite side to 5V. The middle pin effectively reports how many electrons are slipping through. Cranking the potentiometer restricts or expands the flow.
Firmware
Before diving into the instrument, it’s a good idea to ensure that the hardware is assembled correctly with the smallest functional program. Follow these steps to see if the potentiometers can be read from:
- Create a new Arduino sketch named
arpeggiator. - In
setup, initialize the serial port and prepare pinsA0,A1, andA2forINPUT. - In
loop, read and print the values of the three potentiometers usinganalogRead. - Print a blank line after printing the three values. That way you can visually “chunk” the stream of numbers.
- Add a bit of a delay at the end of
loopto slow down the barrage of numbers.
Upload your code. You should see triplets of numbers emitted in the Serial Monitor.